
Tips & tricks to start with Twinfield
Of course you want to get started with Twinfield as quickly as possible. Here are the 11 steps you must take in order to be able to quickly start working in Twinfield.
1. Importing ledger accounts Balance Sheet / Profit & Loss
Only if an empty administration (template) has been used as the basis for the administration.
Twinfield offers the possibility to import your general ledger with an import template.
Select the link to find the template Kan ik grootboekrekeningen importeren? (site.com)
After downloading and filling the import file, go to File Manager.
Here you can upload the files and then import them.
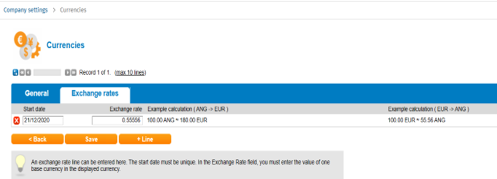
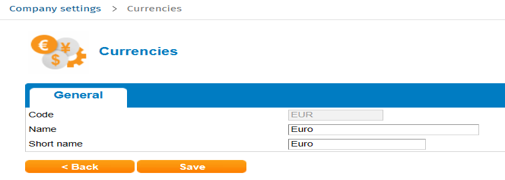
2. Setting basic and reporting currency
- You can set the system accounts in Settings –> Company Settings –> Currencies.
- The name and abbreviated name of the base currency can be entered here. The exchange rate of the base currency cannot be changed, as the value is always 1.

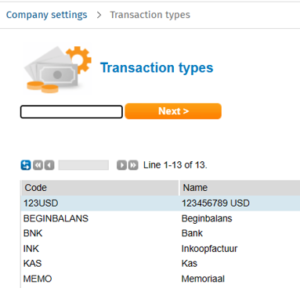
3. Setting the Transaction Types
- You can set the system accounts in Settings-> Company Settings –>Transaction Types
- Please look to it that you make the Currency changes of each Transaction type based on your base currency.
- The changes can be made by selecting the transaction type

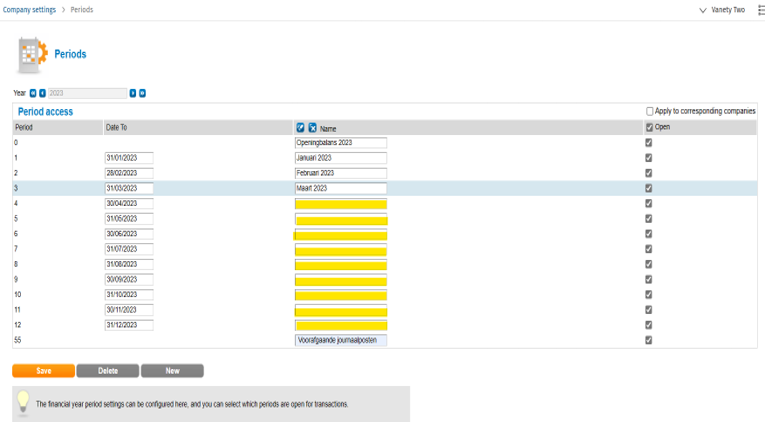
4. Setting the Period
- You can set the system accounts in Settings-> Company Settings à Periods
- Select the year from when you will start the administration in Twinfield. And open the periods. Fill in the needed data / Months
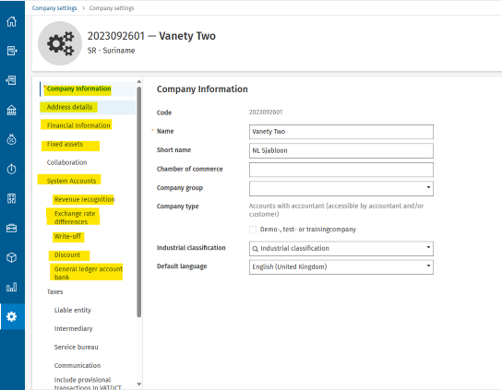
5. Setting the Company Settings
- You can set the system accounts in Settings-> Company Settings –> Company Settings
- Fill in the Yellow highlighted fields
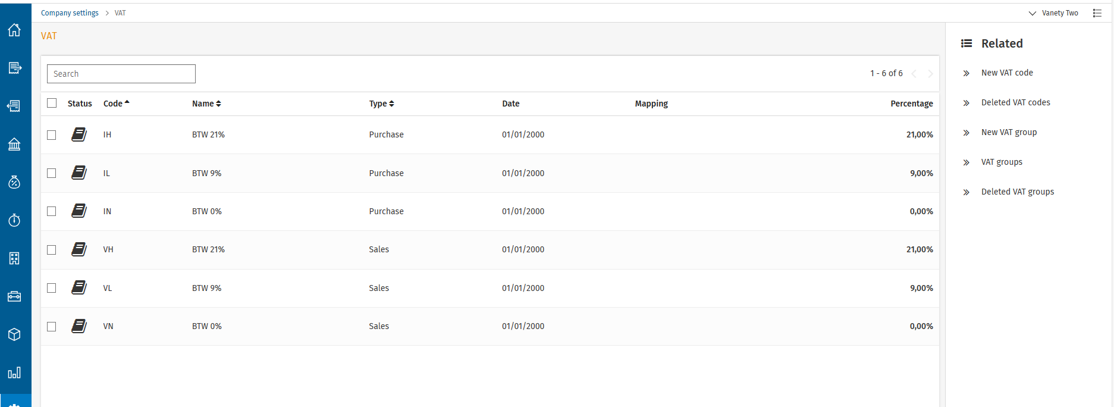
6. Setting VAT codes
Check the tax codes in Settings -> Company Settings -> VAT. Select an existing code or choose one of the related (on the right) menu items.
Add all possible tax codes to the template administration including the link to the right general ledger accounts. These are then automatically included in the new administration that you create based on this template administration.
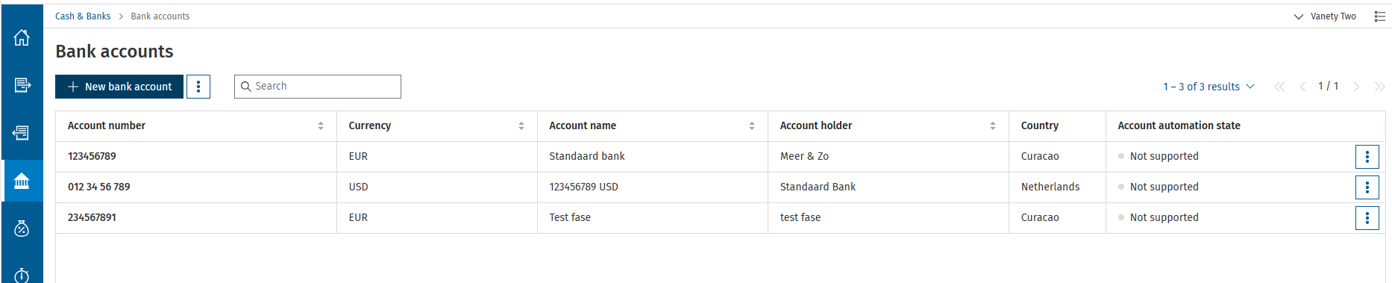
7. Setting journals Cash & Bank
Go to Cash & Banks-> Bank accounts –> New Bank account –> Fill in your Bank account information –> Create and go to account settings.
After adding the data you choose to save.
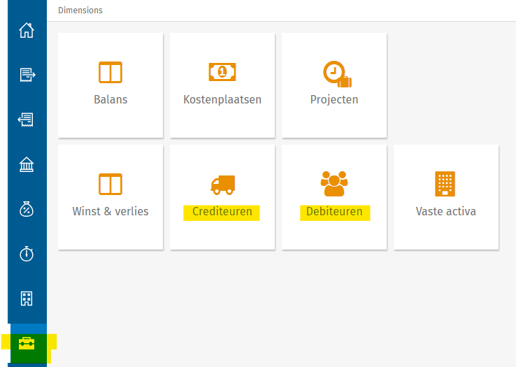
8. Accounts Payable / Accounts Receivable
- In this function you add your Account Payable and account receivable manually. Financials professionals–>Dimensions–>Account Payables; Account Receivables –>First free code –>Next
- Twinfield also offers the possibility to import your Account Payables and Account receivables by using a template.
- Template for account payable : Kan ik de stamgegevens van crediteuren importeren? (site.com)
- Template for account receivables : Kan ik de stamgegevens van debiteuren importeren? (site.com)
- After downloading and filling of the import file, go to General -> System -> File Manager. Here you can upload the files and then import.
9. Define bankimport – csv bank statement template
To set up your bank statement go to File Manager -> Select Bank CSV file -> Import and click ‘New’. Now a screen is opened where you can set-up your own bank statement template. The page consists of two parts. The general settings of the template and the actual columns of the CSV file. There are a few values from the CSV file which are mandatory to be used:
Name template
This name will be used to identify the template in the template selection boxTransaction date
The transaction date given in the bank statement should be the same as set within the settings of your company.Description
Amount / amount received, amount paid
Banks can set-up their given CSV bank statements very differently from each other. Some banks will give amounts with a minus sign in front of it, while others use a separate column to give the value Credit for it or there can be different columns for amounts received and amount paid. Twinfield supports these options. In the template it is not possible to use both the values Amount (and Debit/Credit) with the values Amount received and Amount paid. Also if the value Amount received is used, Amount paid should also be used.
When all values are provided with values on it, the template can be saved and the template can be used for importing your bank statements.
10. Sales invoicing dashboard
Create templates for Quotations, Invoices and Reminders
Create e-mail templates for Quotations, Invoices and Reminders
Create articles
11. Sales invoicing Classic
Uploading & Linking Word template
After creating a Word template, you can upload it under General -> Organisation -> Word templates. Enter a new code or select an existing code and click ‘next’.
Upload the file here and choose ‘Save’. To create invoice templates you can apply for a training, or make use of our consultancy services.Setting billing & Linking Word template
To set the operation of VAT and invoice numbering, go to Credit Management -> Invoicing -> Invoicing Types. Enter a new code or select an existing code and click ‘next’.
It is also possible to link the Word templates here.
More information is to be found in Twinfield Knowledge Base.
Need help to set up your administration?